My kids like to play the game, Two Truths and a Lie. I’m about to tell you two truths and a lie. Here goes:
- When Andrew and I bought our first house, back when we lived in Annapolis, MD, it was a real fixer-upper, and we painted the exterior yellow.
- When I was 7 years old my mom was in a commercial that involved shots filmed from a helicopter, and afterwards I got to ride in the helicopter.
- When I was 15 I was a Senate Page at the Capitol in Washington, D.C.
Can you guess the lie? Up until this January, we had never before painted a house.
Before we bought our new house in Tucson it was painted with the camo-green color palate of a military school uniform. Might be a nice look for a craftsman house or a house in the woodsy North East, but it was not cute on our almost mid century, modern brick ranch in the desert.
Know what is cute? These mid century modern ranches, which were my inspiration for our house:
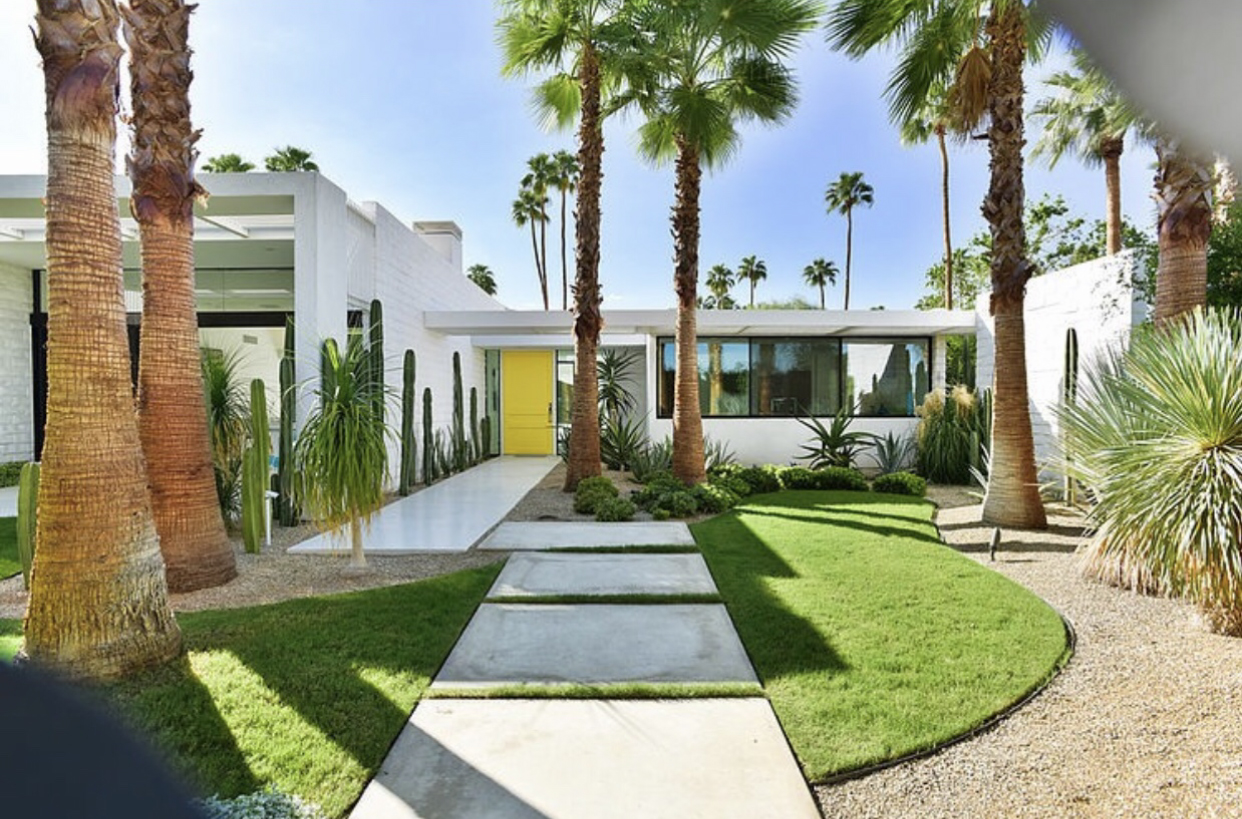
Photo from Remodelaholic
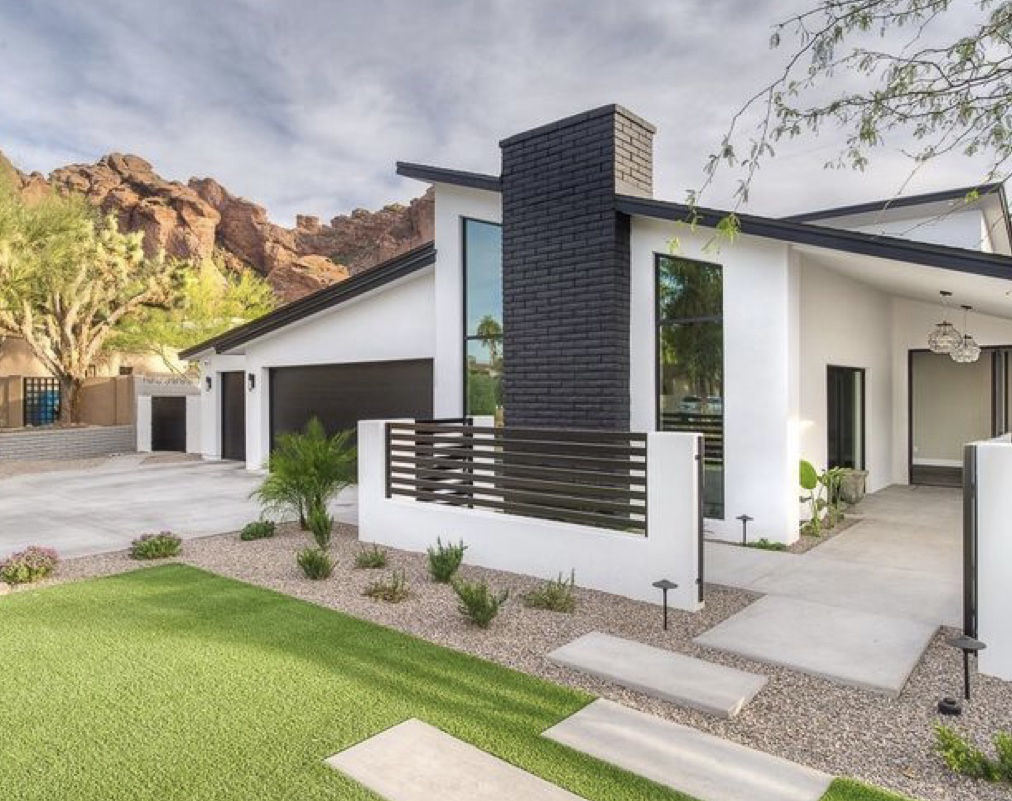
Photo from Two Hawks Design &Development
I knew I wanted our house to be white with dark grey trim, like these, and I also wanted to create a walkway, similar to these walkways, with pavers surrounded by grass. Well, I wanted to use artificial turf, because, ya know… Tucson.
I also wanted to do a fun color on the front door that would reflect my interior design, and reference the aesthetic of our favorite style of homes, Palm Springs homes.
Here is what we had to start with, a view of our front walk when we bought the house last June:
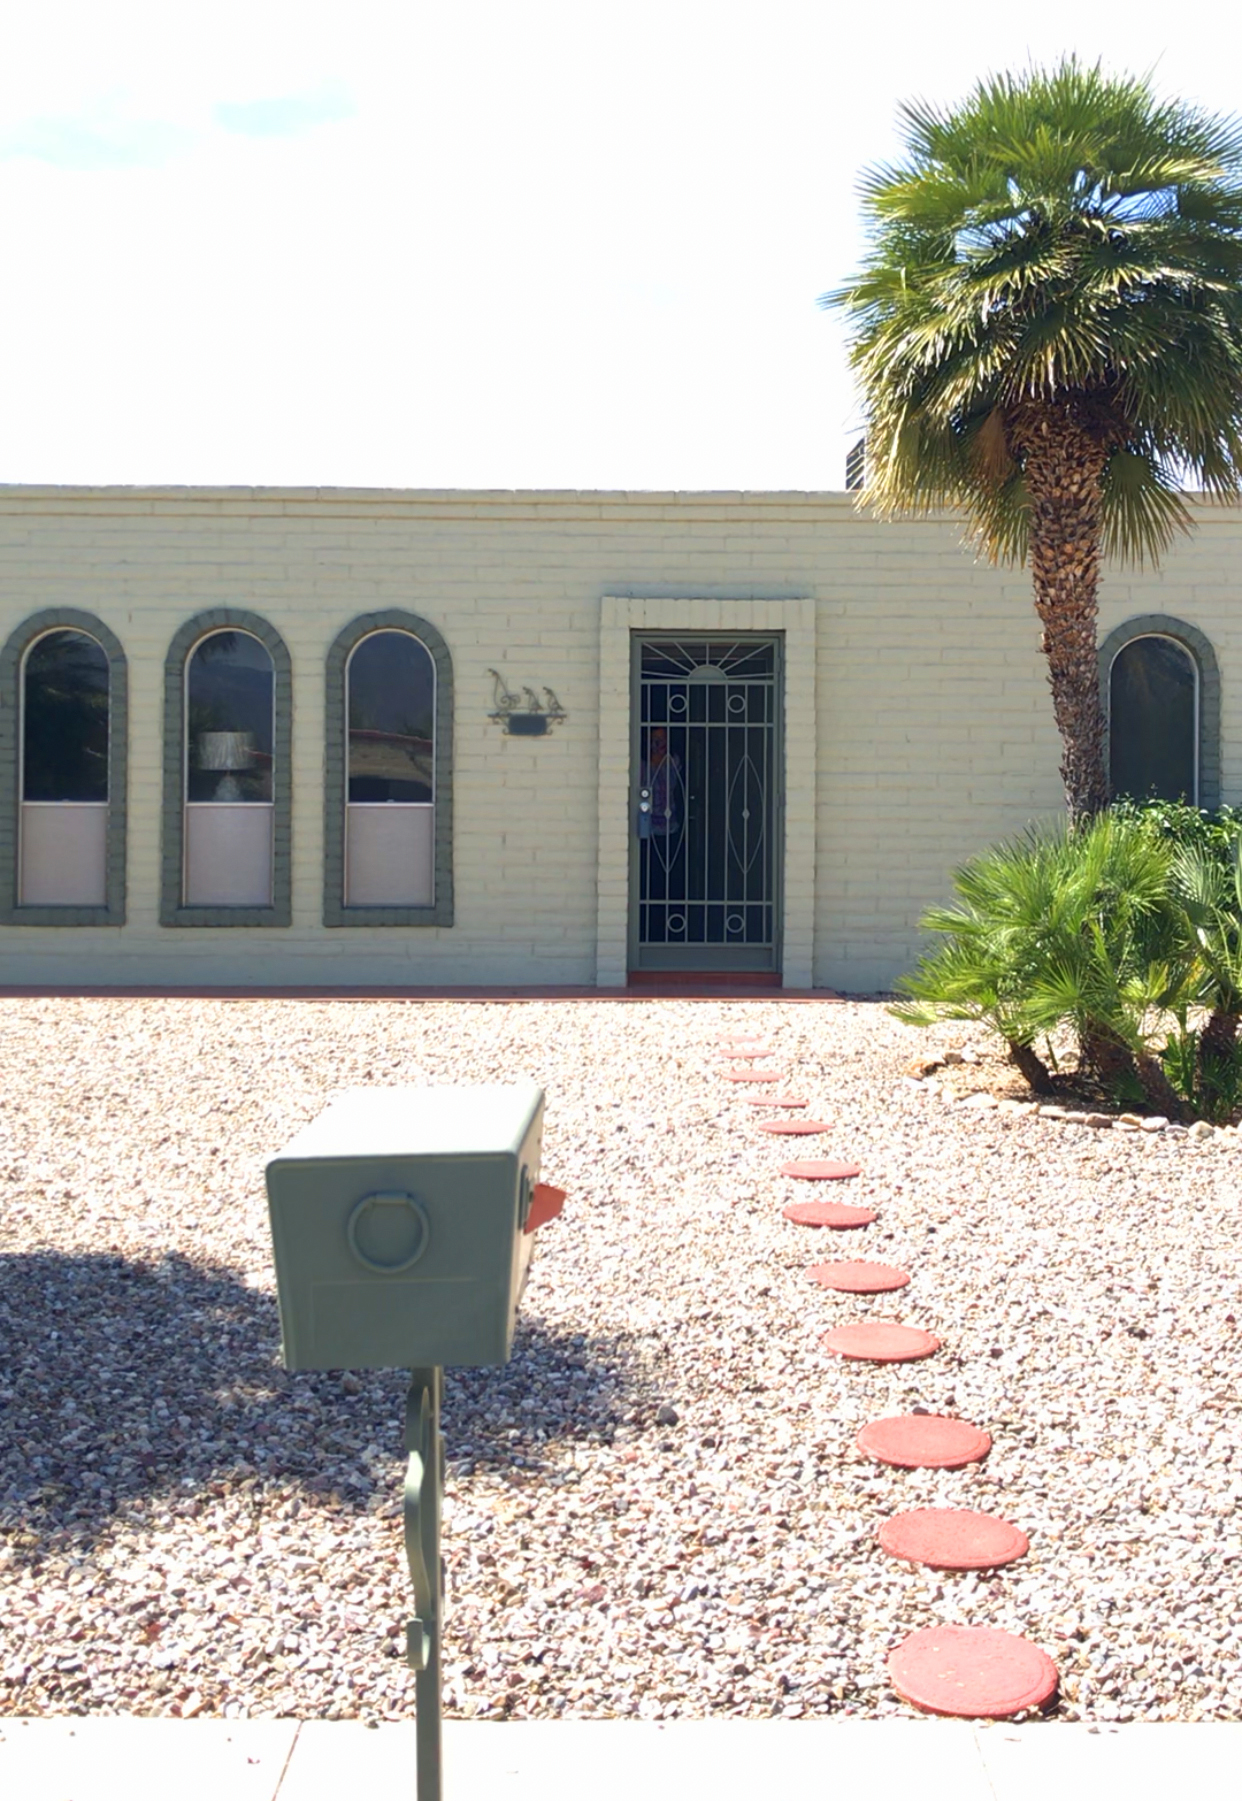
Now you get the camouflage reference 
See the barely existent walkway? Those round terra-cotta pavers were child sized, not even big enough for an adult sized foot. Plus they didn’t stay put. It was like trying to walk on a rocky beach, stepping awkwardly from one big stone to the next. And since we get a lot of deliveries for our family business I felt badly for the delivery guys who had to constantly bring packages those 30 feet to our front door.
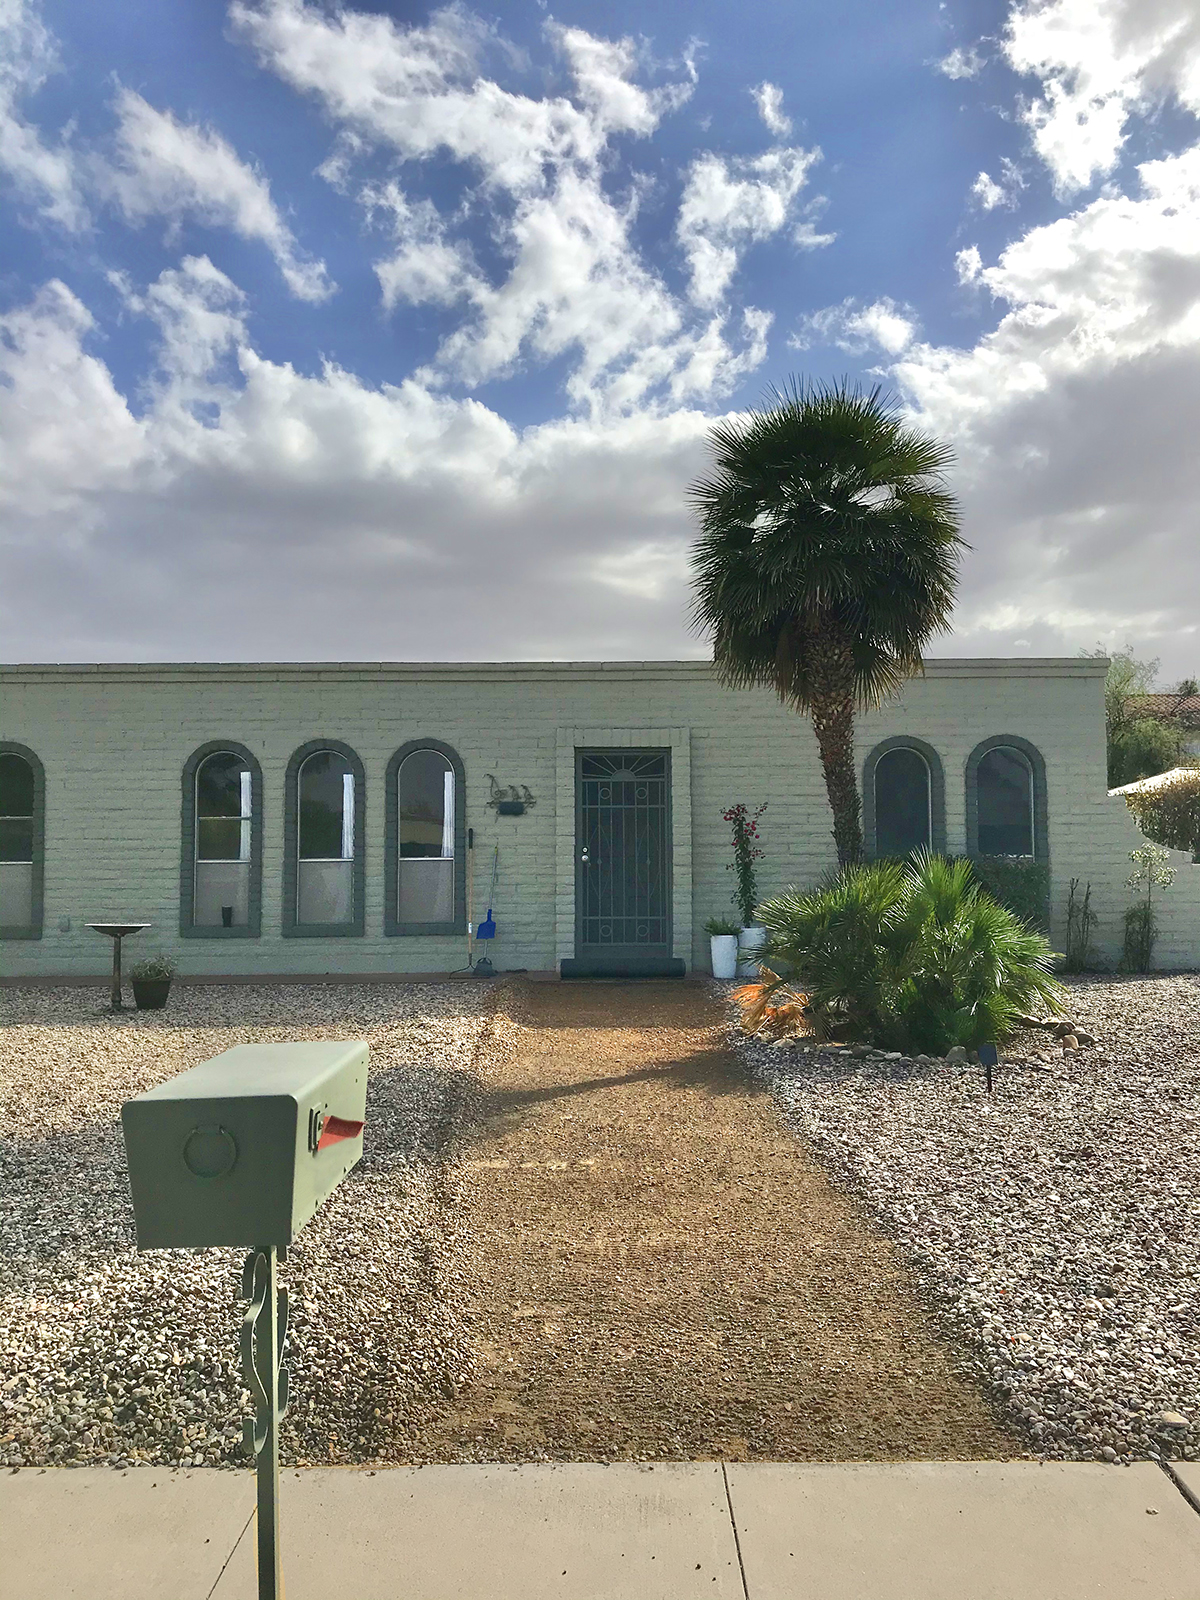
I started by removing the stones and clearing the rocks.
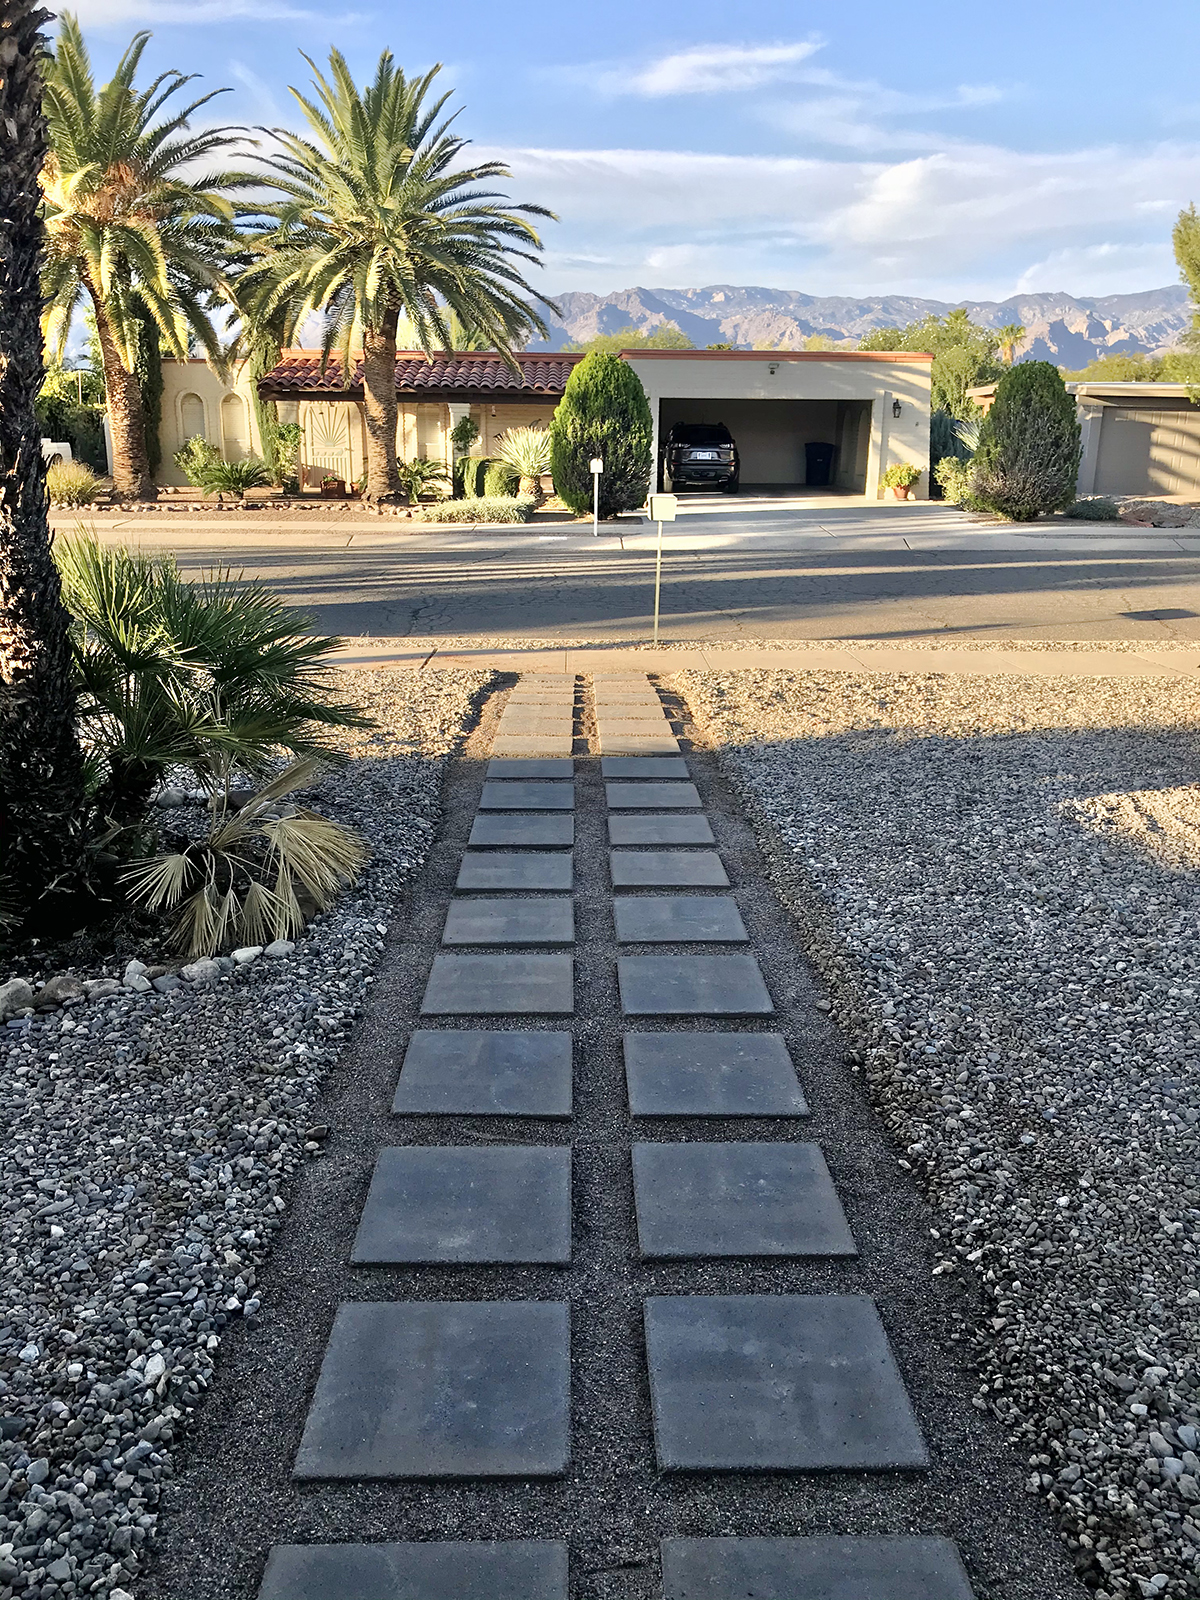
From the front door, looking towards the street.
Then the hard part began. I loaded 34 eighteen inch pavers into our minivan, then carefully measured and unloaded them onto the ground. They were very heavy, and Andrew can’t lift anything anymore, since his slip disk a few years ago.
I measured the pavers 4 inches apart, and with 4 inches on either side. This was the perfect spacing for the 3 ten foot rolls of artificial turf that I ordered to go in between the pavers. I filled in around the pavers with roughly 20 bags of paver sand, leaving about an inch from the top of the pavers for where the turf would sit.
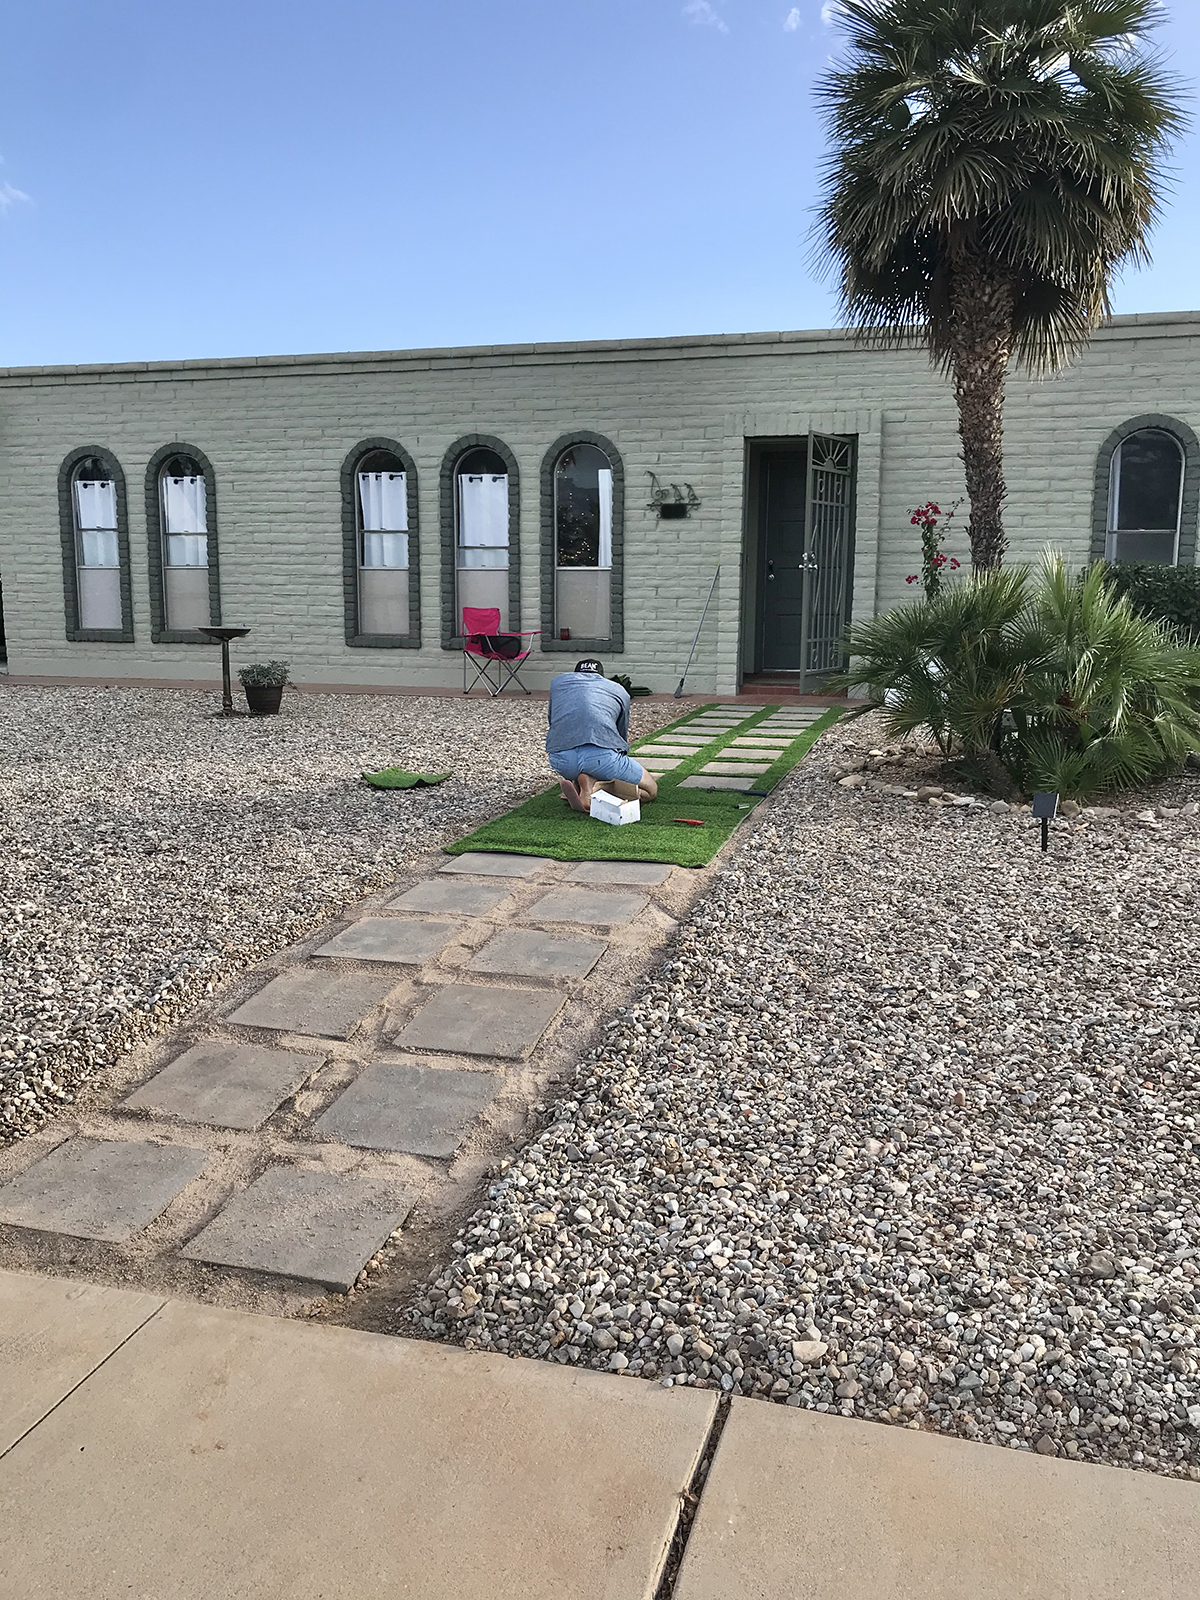
After each ten foot roll of turf was secured around every paver with 6 inch nails, Andrew used a utility knife to cut each turf square out. To install 3 ten foot rolls of artificial turf we used 250 nails and about 20 fresh utility knife blades. Cutting the squares took as long as laying the pavers, roughly 8 hours.
I lined the new walkway with bricks to finish it.
Next I decided to combine the two palm tree beds into one big oval, on the diagonal:
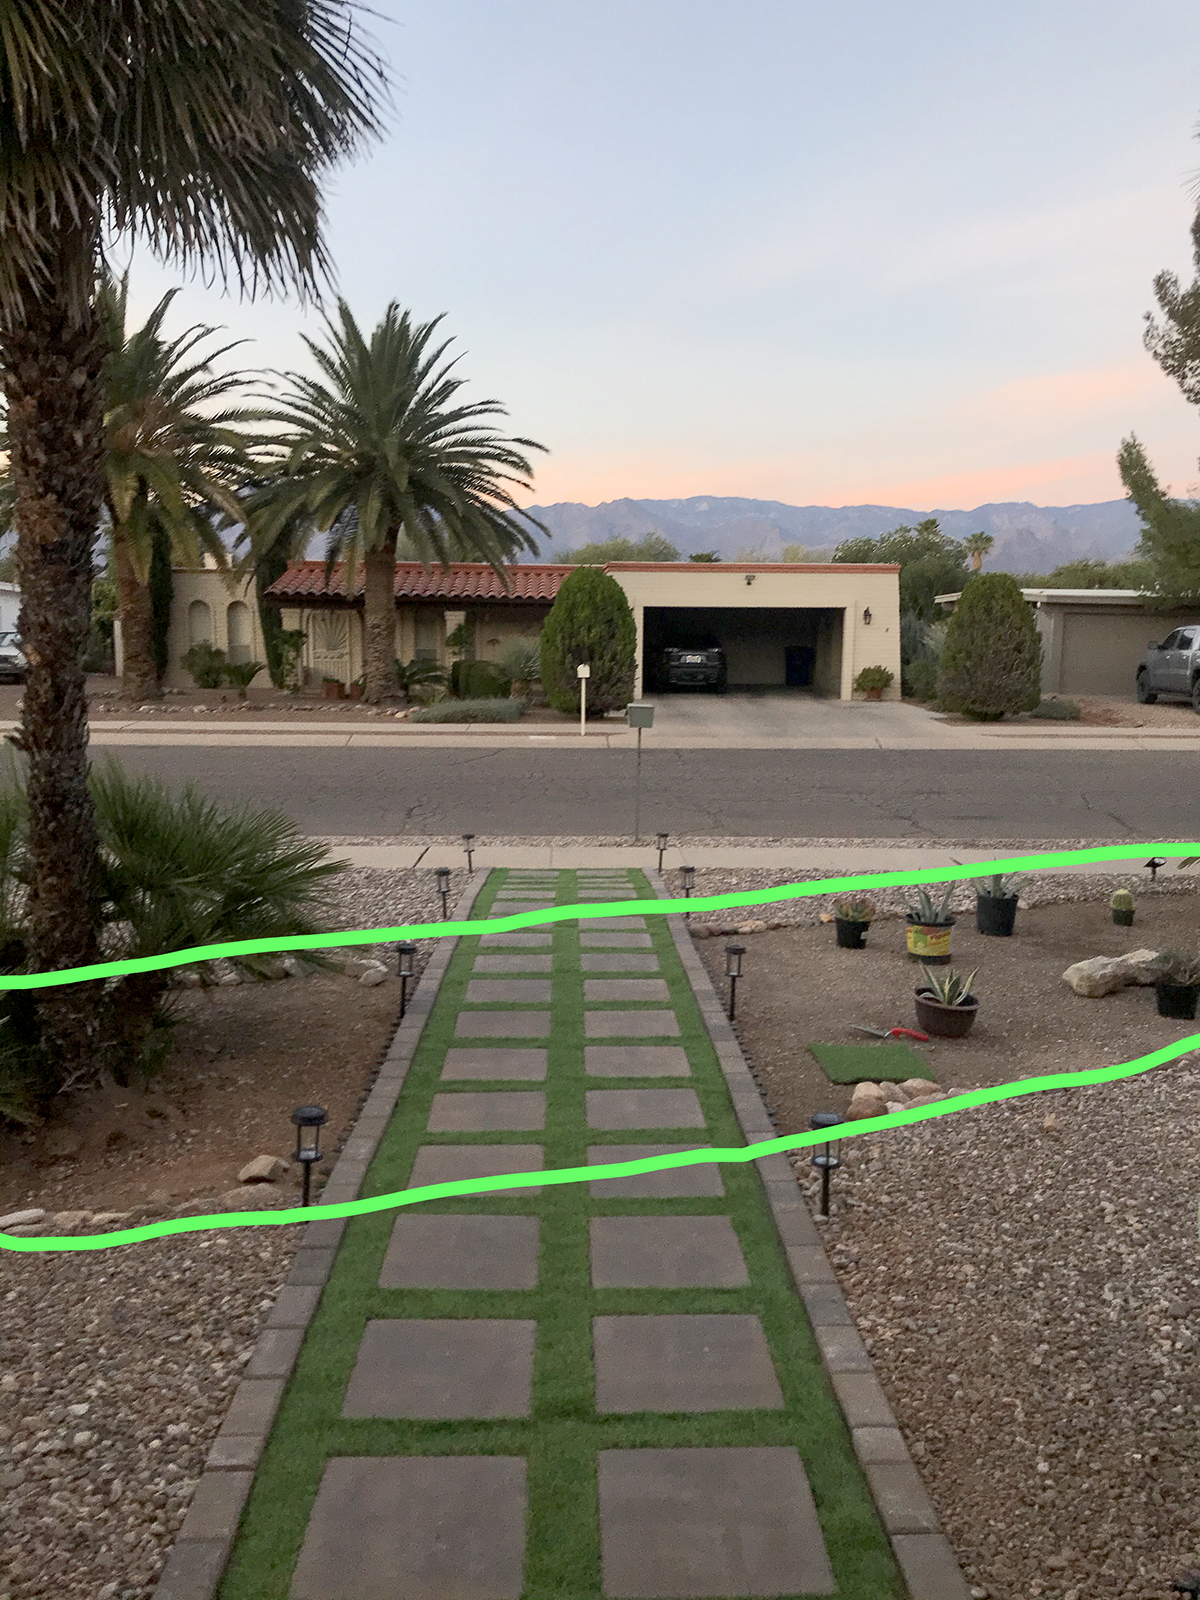
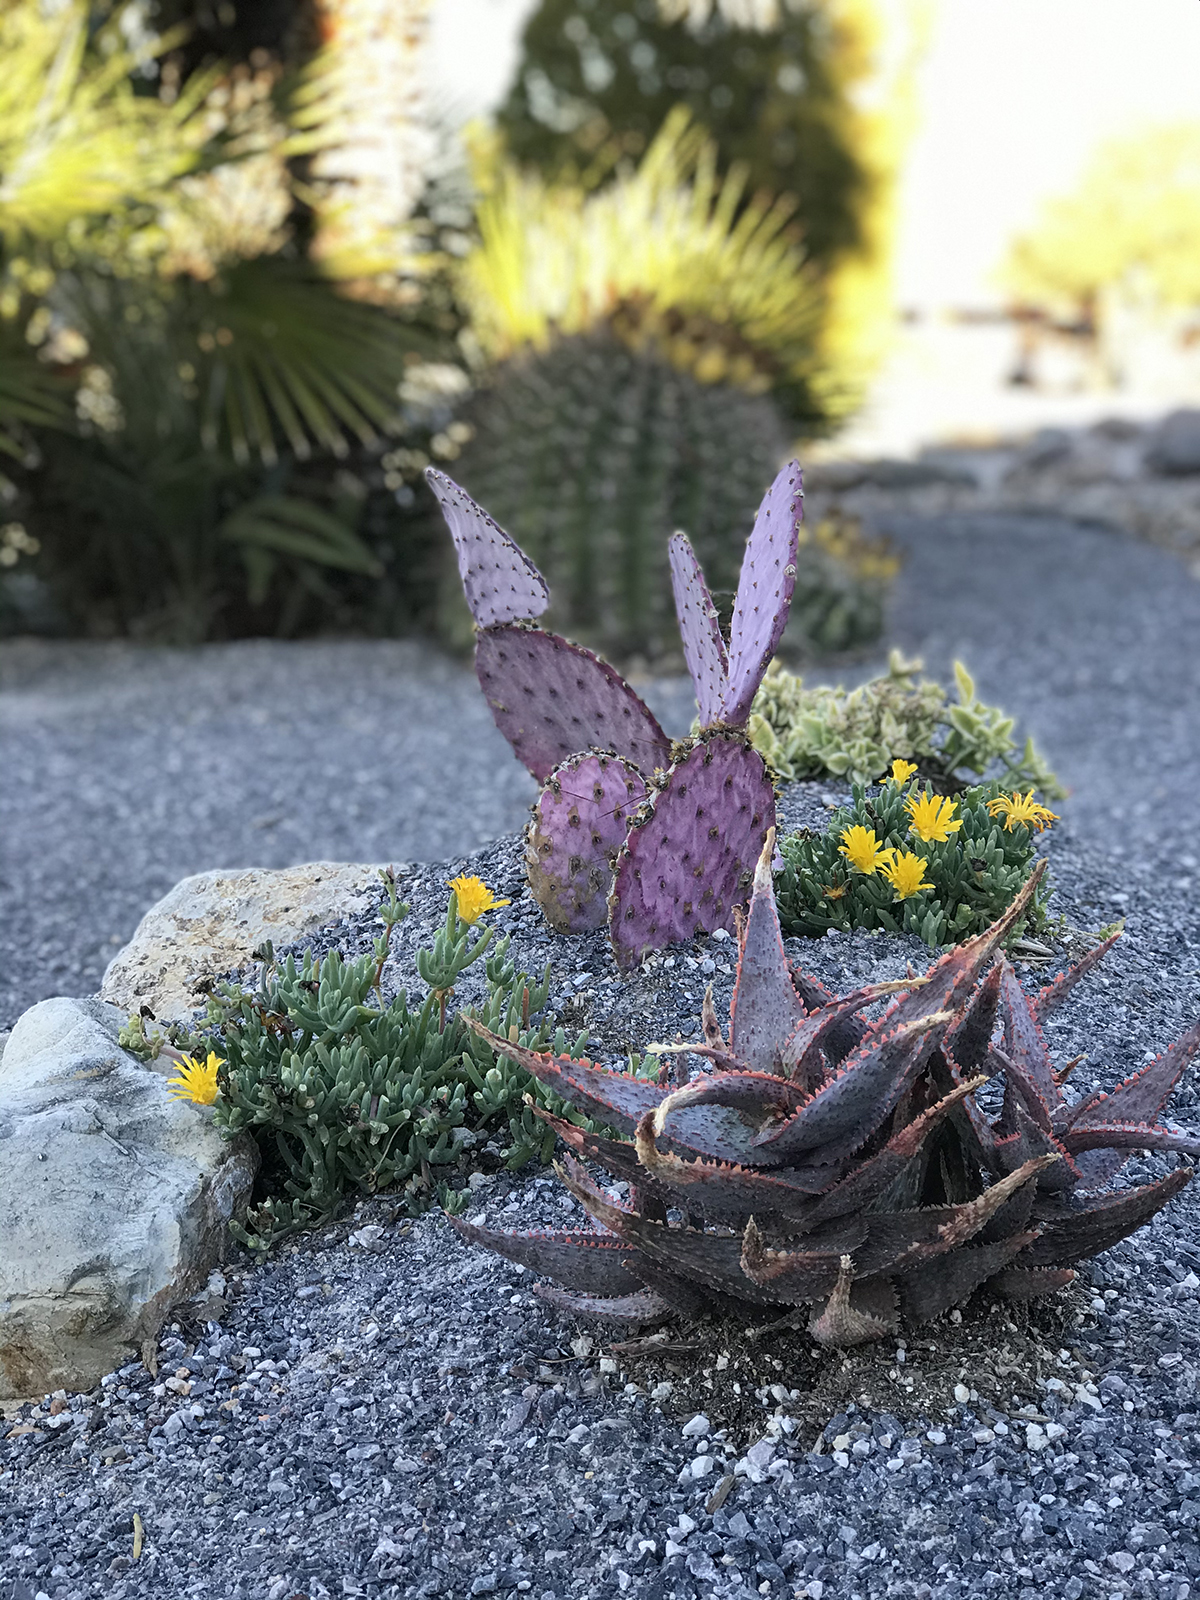
My neighbor likes to propagate succulents and he gave me a bunch of agave, some blue ones, and some yellow and green striped. From a variety of plant nurseries I bought more small succulents to fill in around the agaves. I began, as you can see, by shoveling away what felt like a ton of rocks. It was even harder work than the walkway!
While out for walks and bike rides I looked at the landscaping of my neighbors and saw that the succulents are not all planted on flat ground. Tiny hills covered in succulents are created for interest, and landscaping rocks about 18 to 24 inches wide are strategically placed around the hills.
After laying out my own plant arrangement, including where the tiny hills and rocks would go, I put the plants in the ground. The ground here is so hard it’s like baked clay. So I had to make very small holes, fill them with water, wait an hour for it to soak in, then dig, and repeat. It was kind of a slow process. When the tiny hills, plants, and rocks were all in Andrew covered the empty plant bed area with weed blocking paper, and nailed it in.
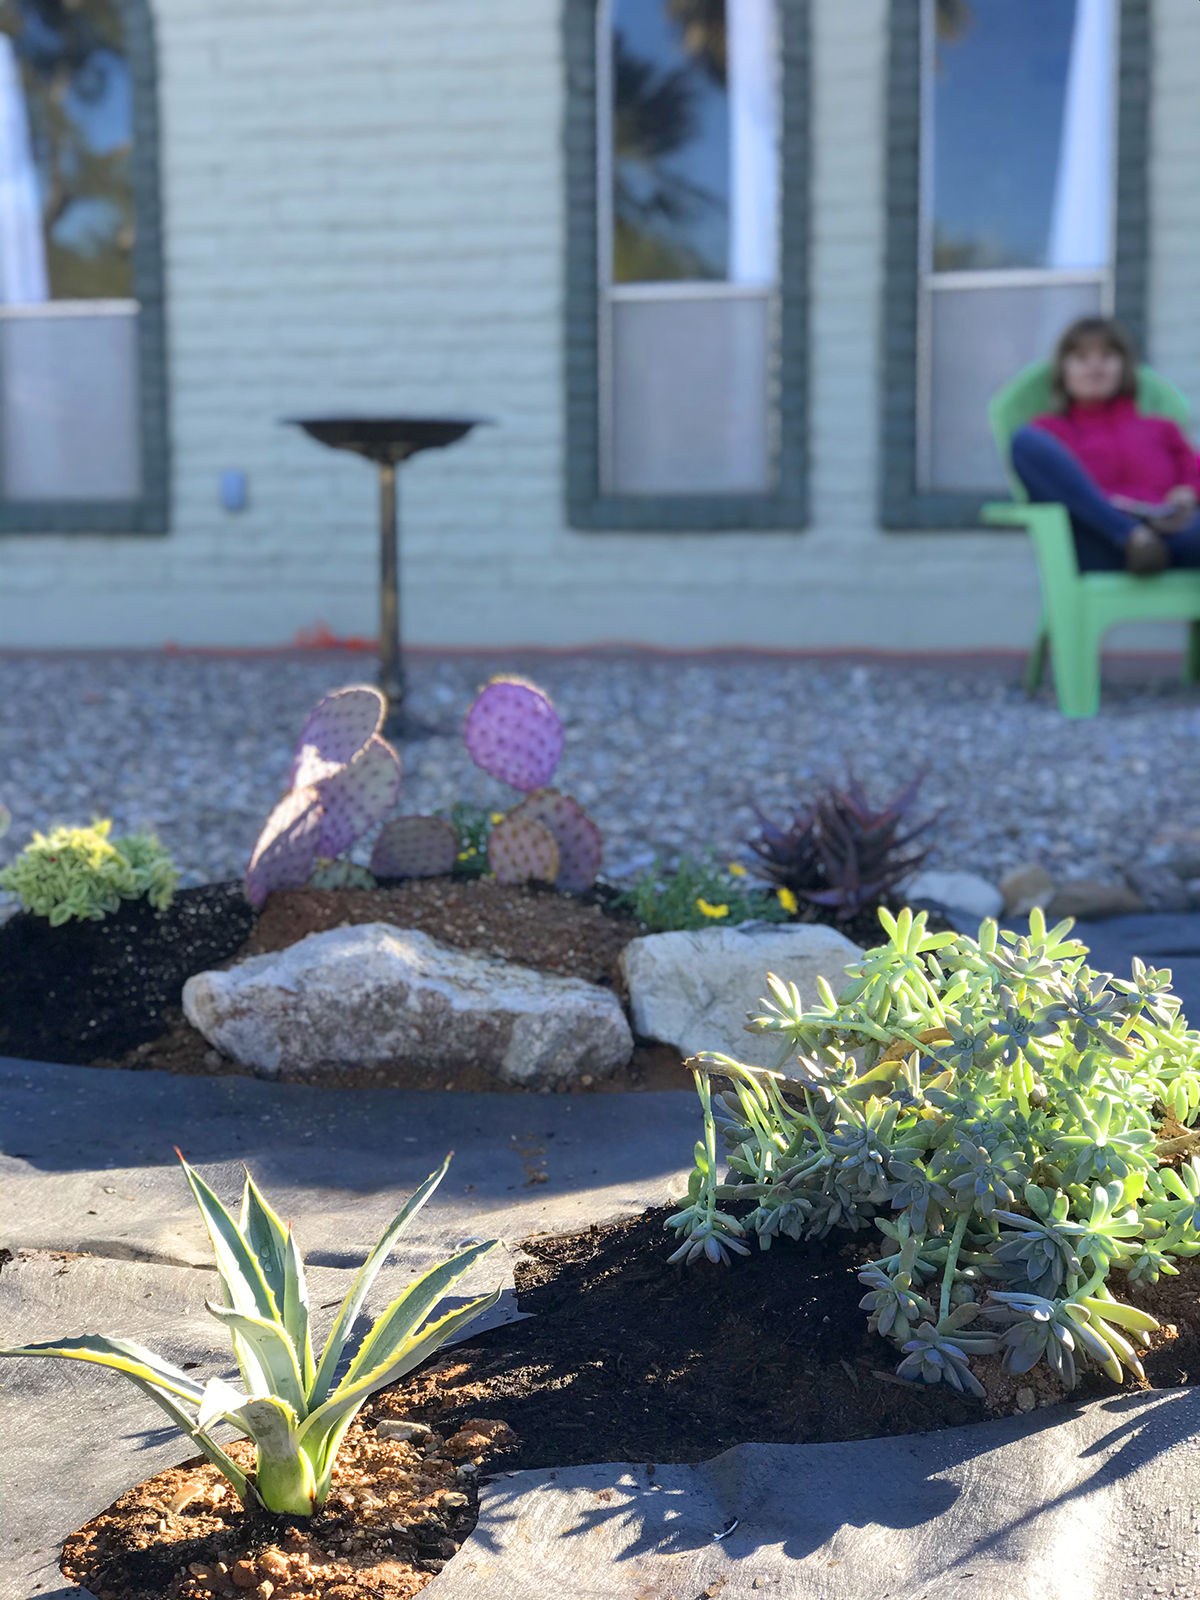
I went to Acme Sand & Gravel and chose grey colored “crushed fines” to fill the bed instead of mulch (which only comes in black and brown). The crushed fines will last forever, and after a few rains they harden in place, so they don’t move.
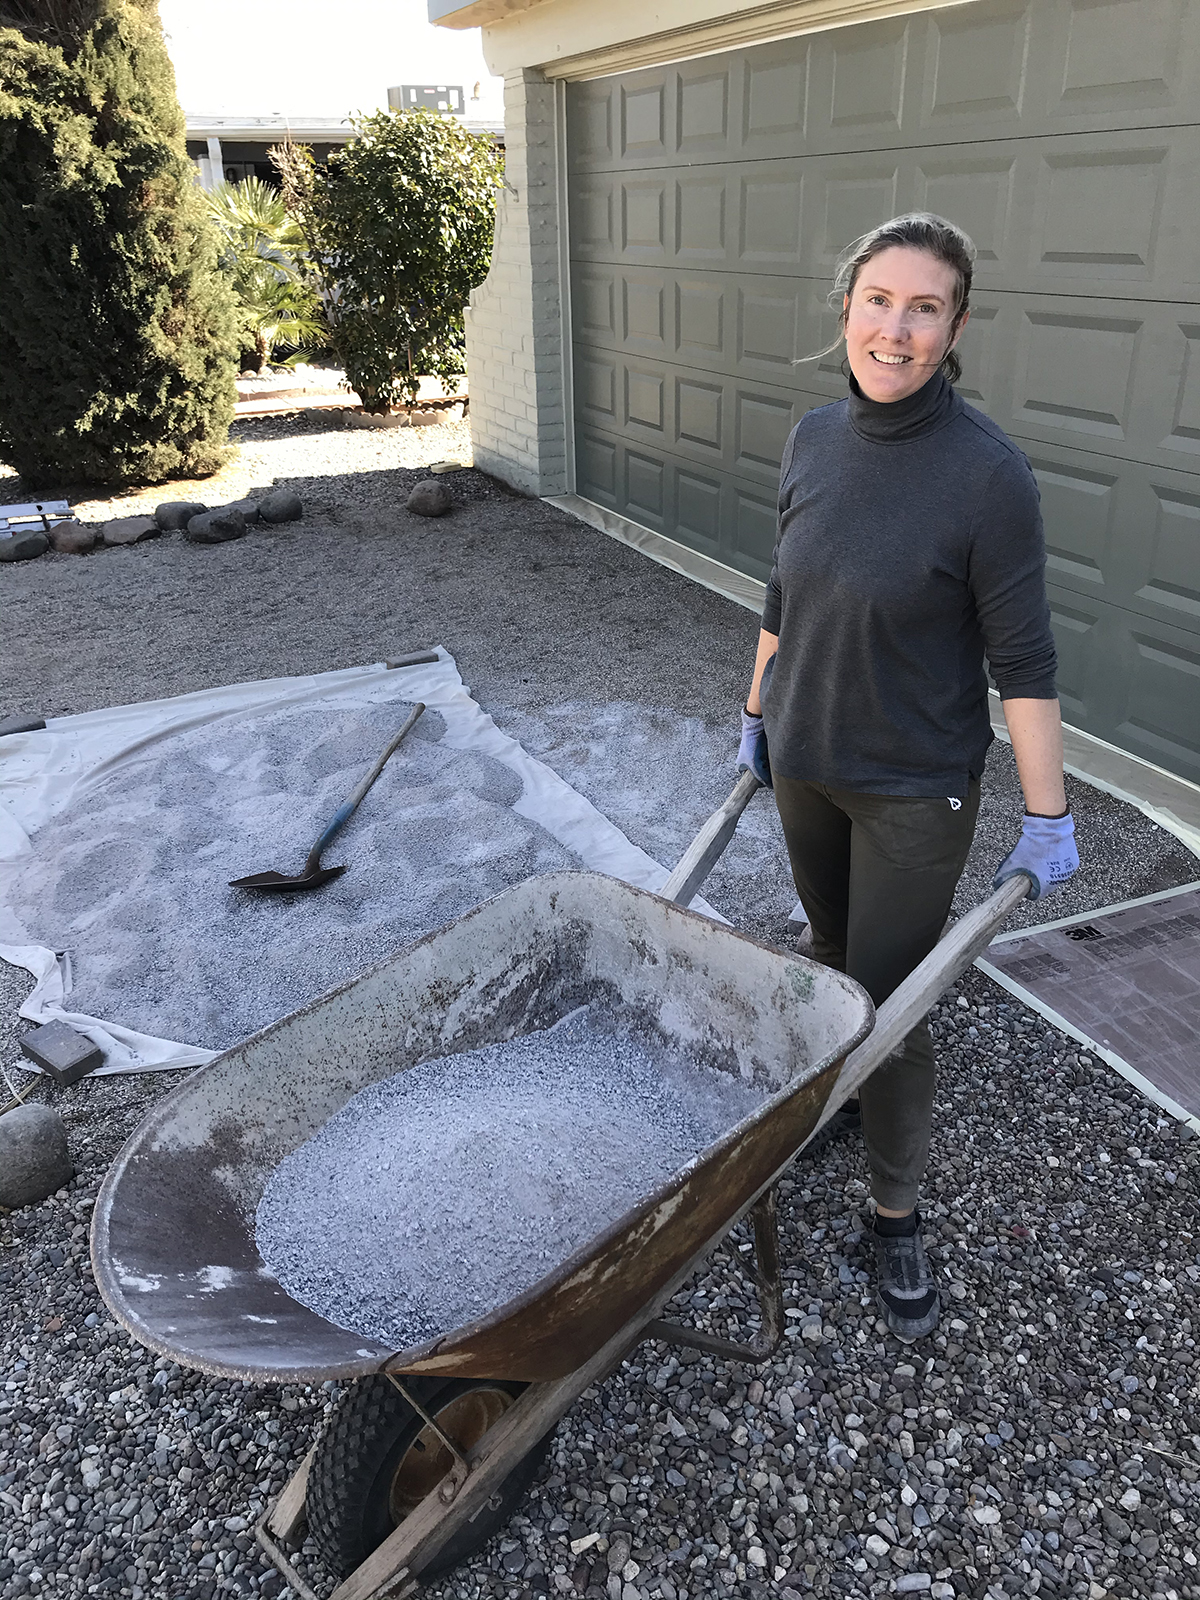
You can move the crushed fines yourself with buckets or a truck, but for something like $50 I had it delivered instead. You put a drop cloth on your driveway (see it behind me?) and they unload it there for you. It’s a lot lighter in color before you water it or it rains.
When the walkway and the landscaping were complete (phew!!!) all that was left was painting the house. I picked a cool white (Sherman Williams Ceiling Bright White I think it’s called) and a cool dark grey called, Cyberspace. If you prefer cool colors over warm colors, here is how to find them. Select way more color swatches than you think you actually need. For our house I selected about 8 whites and 8 greys. When you get home lay the swatches out on your table right next to each other, so that they touch. This way you can see which colors lean toward blue and which lean toward yellow. The ones that lean toward blue are cool and the ones that lean toward yellow are warm.
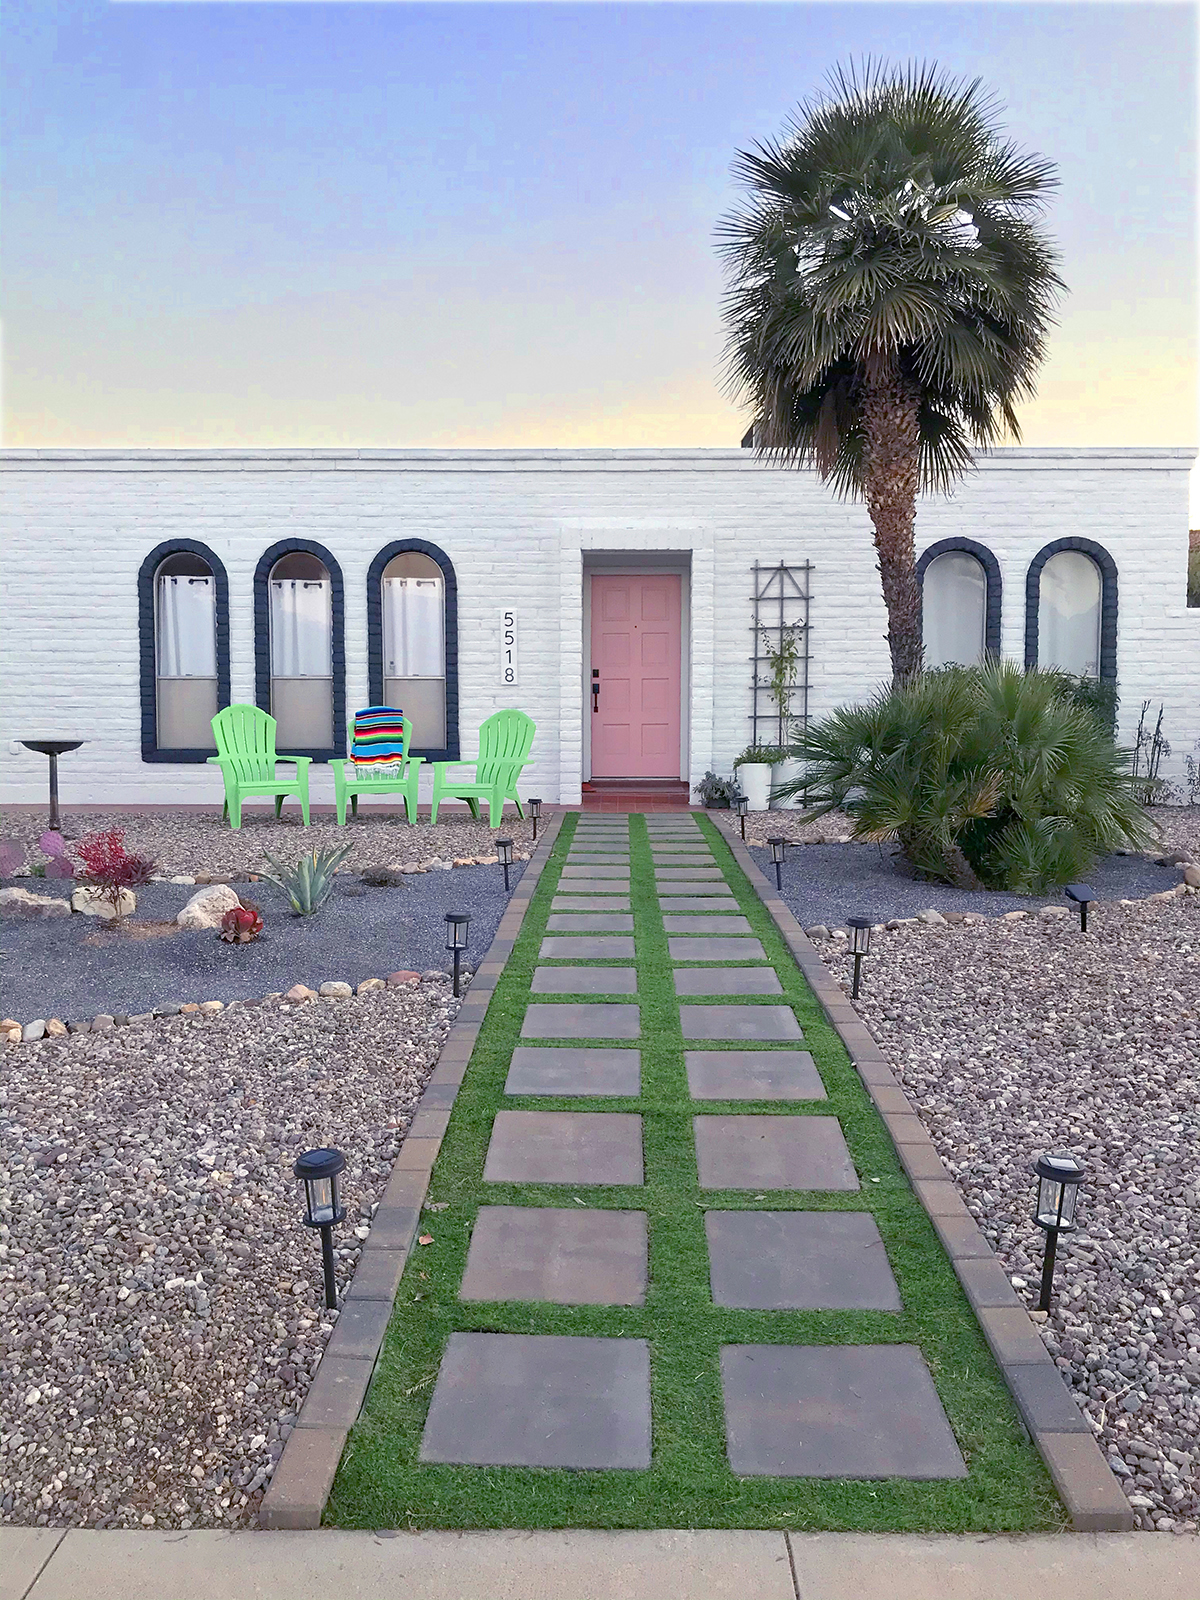
After
I can’t stop staring at it! It looks so different, so us! 
I still want to fill in the plant bed with a few more succulents, but I haven’t found the right ones just yet. To the right of the front door I added a hot pink Bougainvillea in a tall white ceramic container, which will be really fun when it fills in and starts showing off. On the left I put up modern house numbers to replace the old ones. I went with a pinkish peach color for the front door, similar to the color I put on the desk wall.
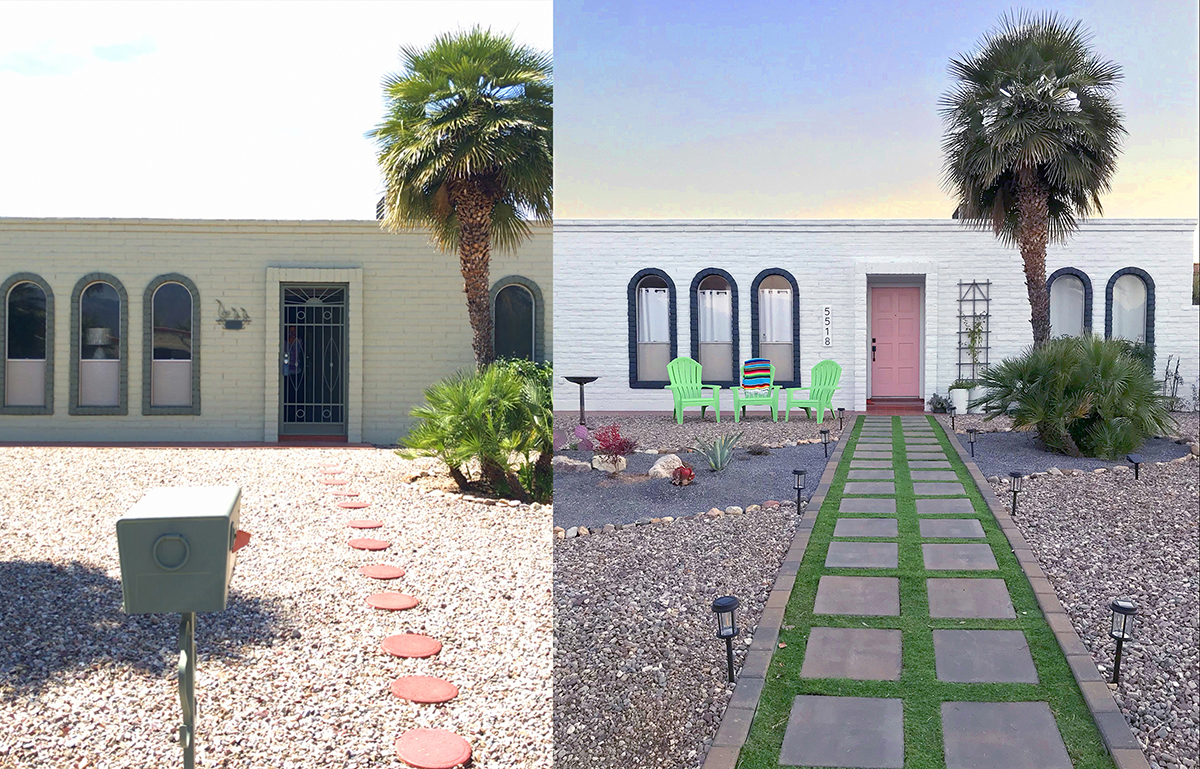
The side by sides are my favorite before and after photos, both these and the horizontal ones below!
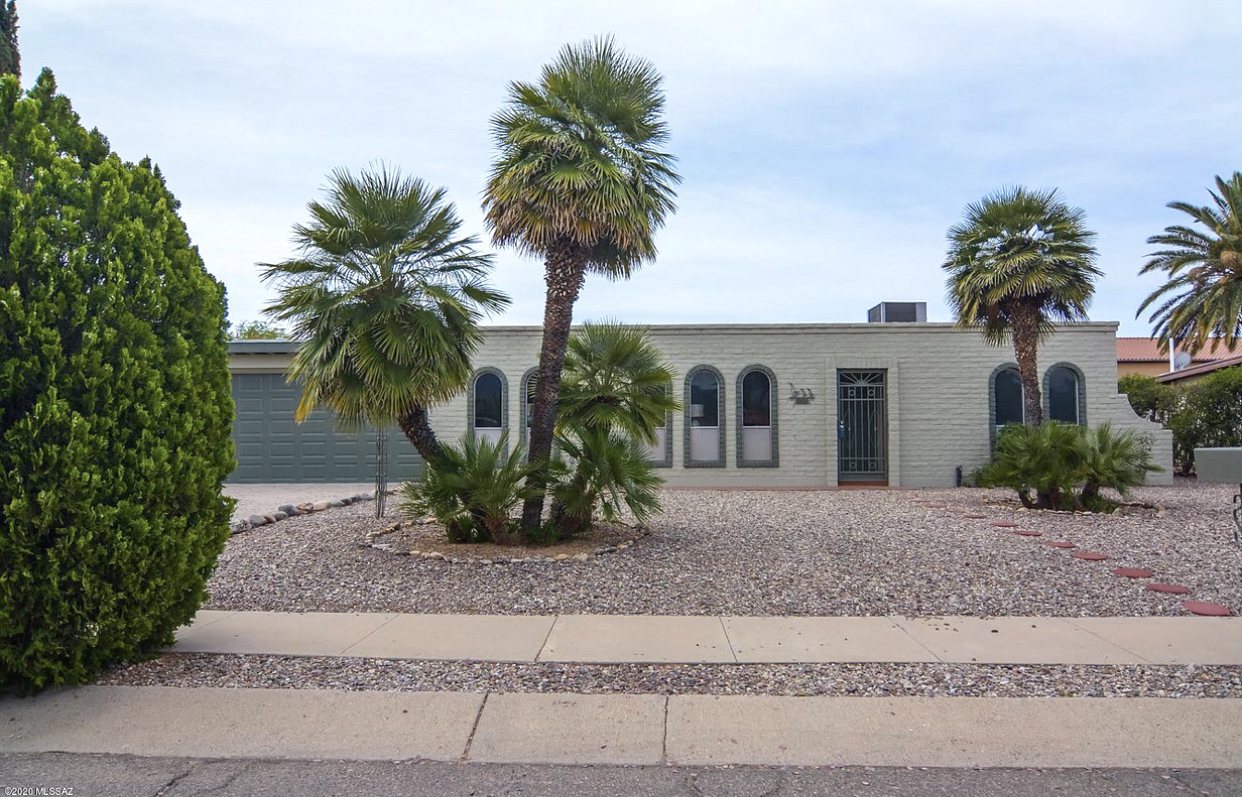
Before
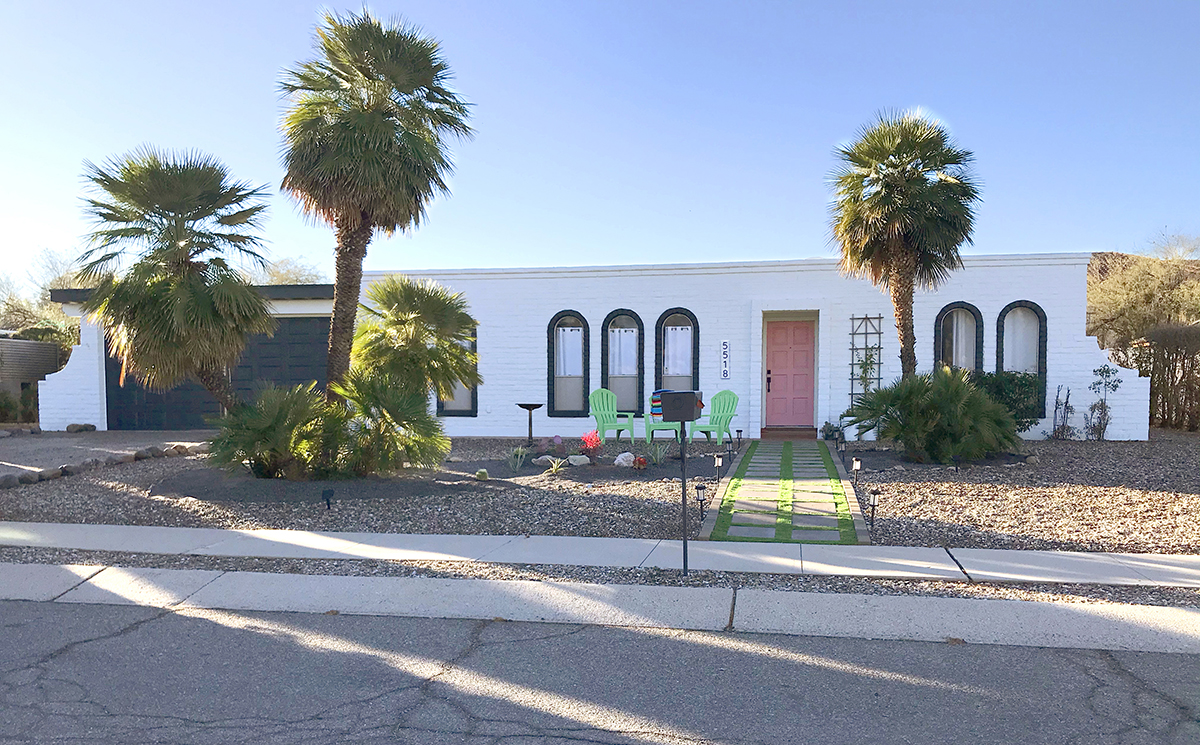
After!
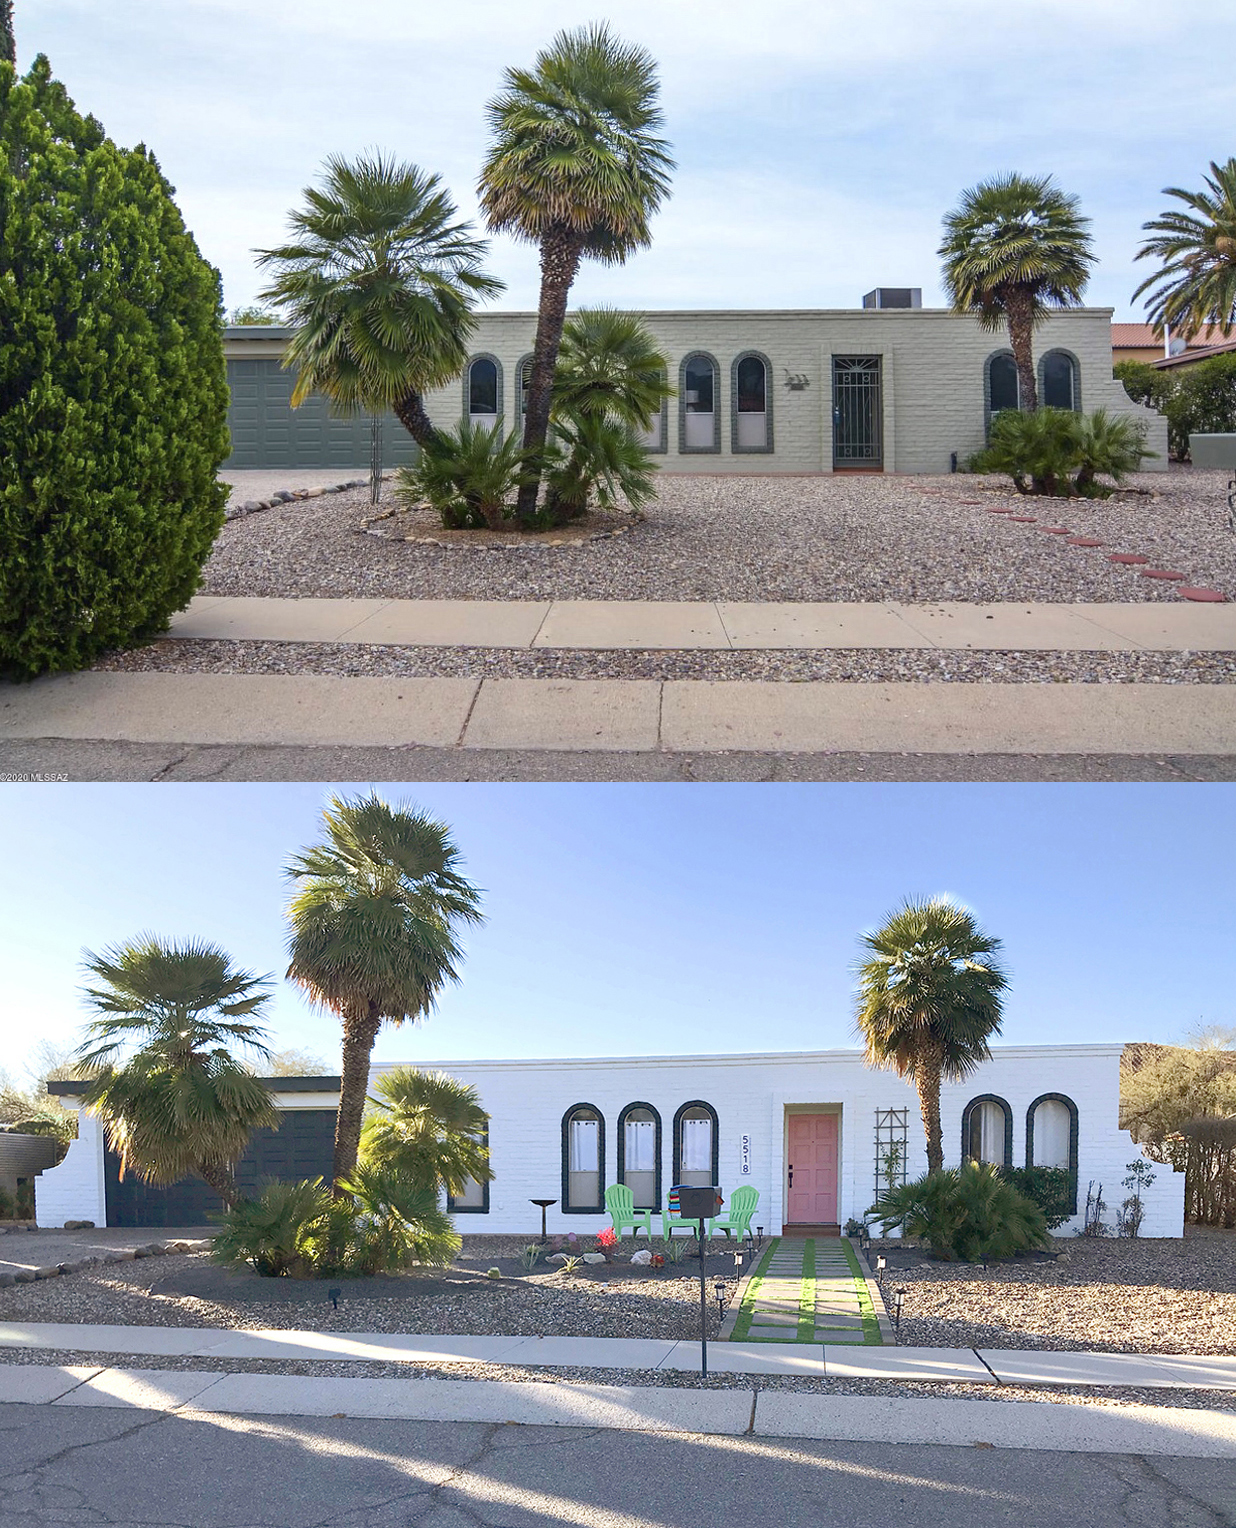
I love how it turned out!!
But we didn’t just paint the front of the house! In the back yard we have this great big shed, which was painted to look like a military colored barn. It really didn’t go. I had a plan to fix it though…
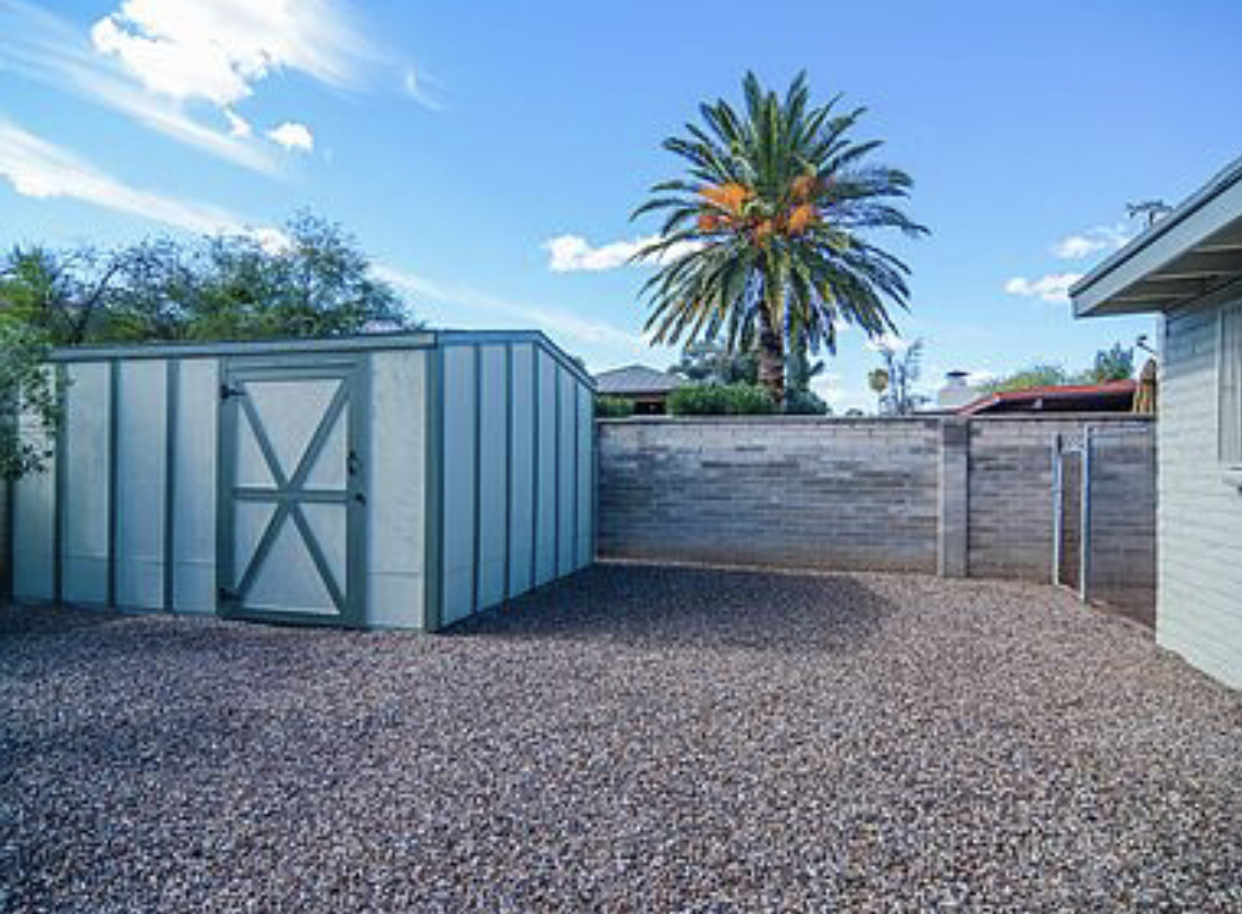
Before
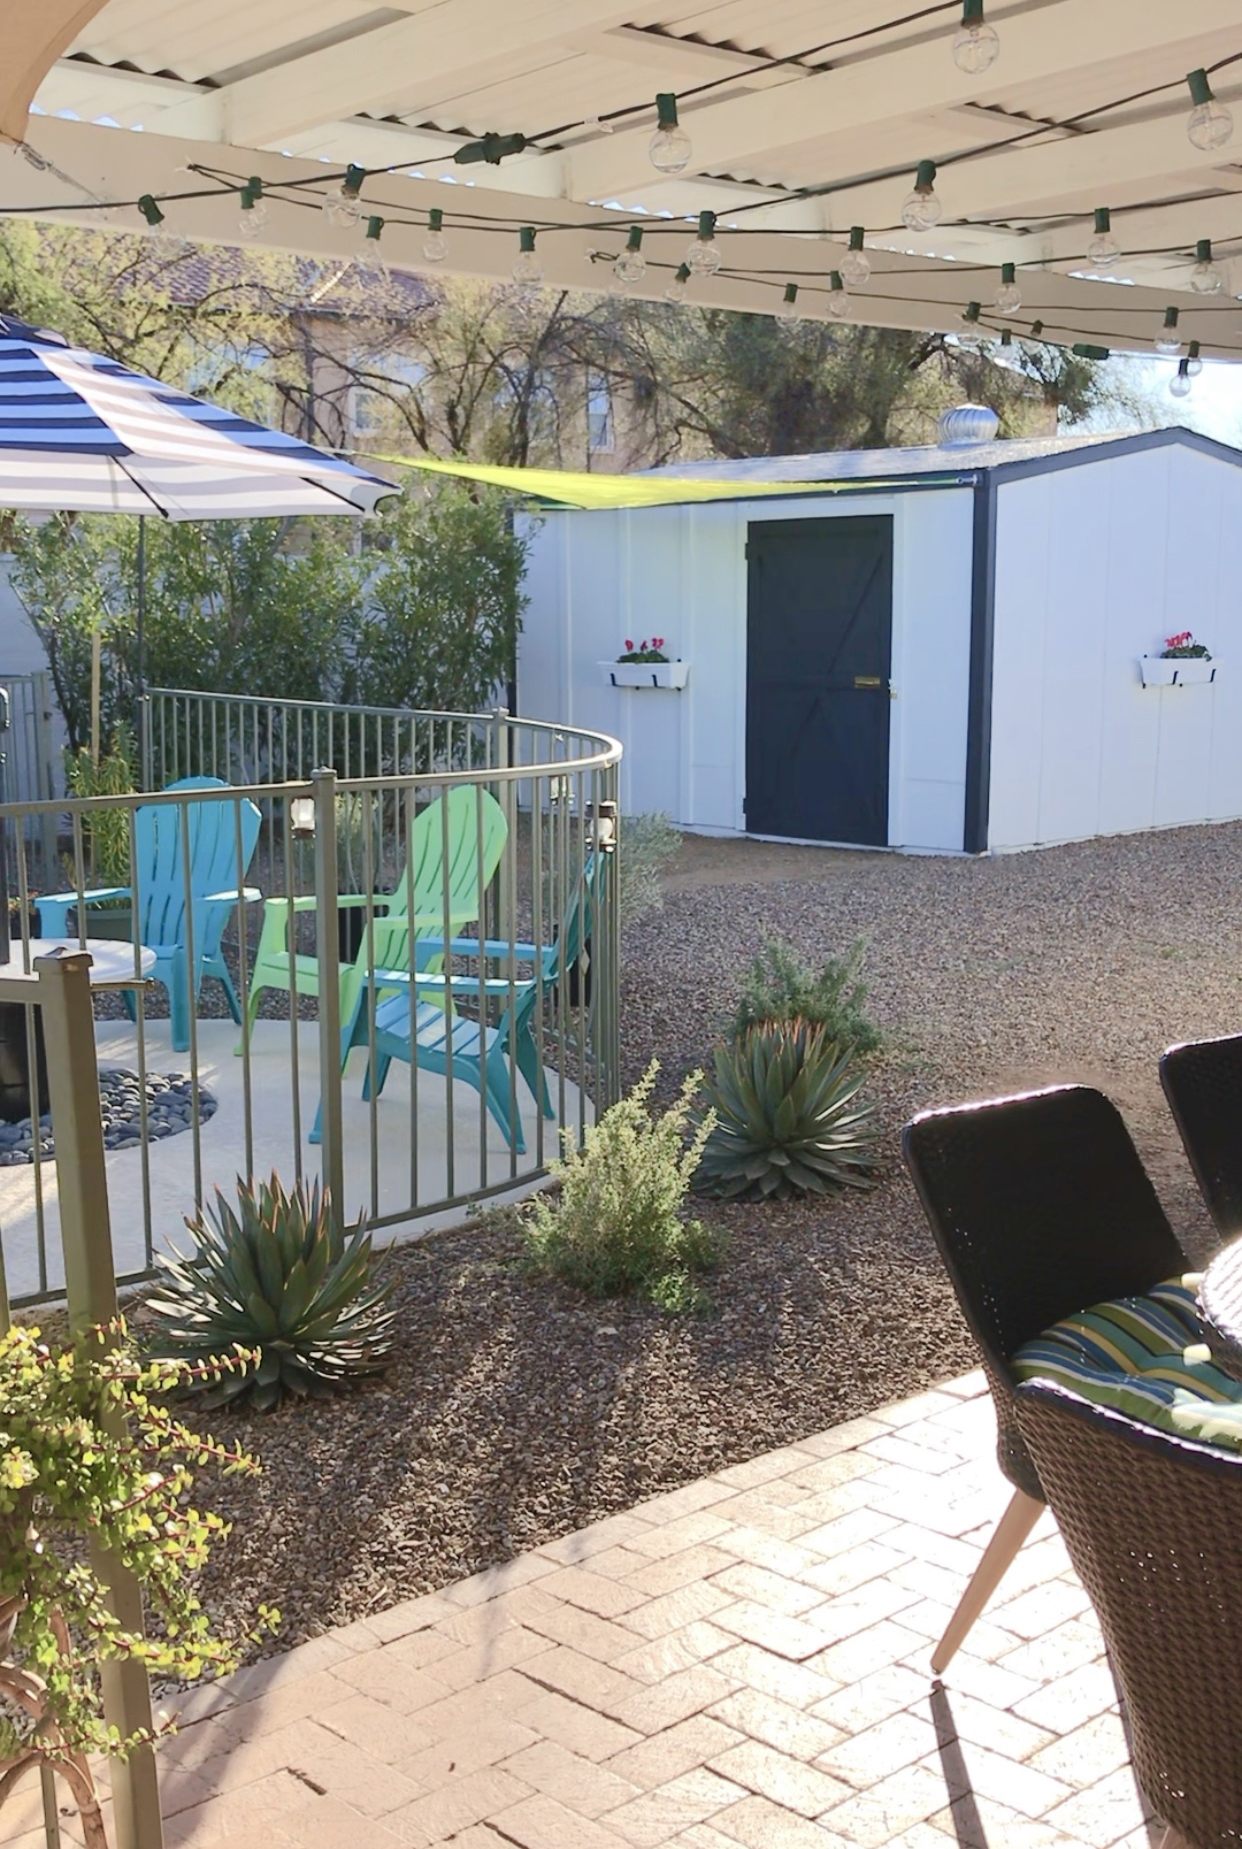
After
Ta-da! I used the new house colors on the shed too. By ignoring the wall and door “trim,” and painting only the corners and top trim dark grey, it has a whole new modern style. I even replaced the black handle with a brass handle for contrast, and put up simple flower boxes, and a bright green sun shade sail.
I’m not finished back here though! I’m getting ready to create a kind of patio in front of the shed, using the leftover 18 inch artificial turf squares and more grey crushed fines. Then I’ll add a walkway from the brick patio to the new shed patio with more crushed fines. When I’m finished I’ll show you!
I no longer make income from Amazon affiliate links. Please support my website by shopping through my other affiliate programs PrimeMyBody and Araza. I love you all!!
 , Kelly
The post Tucson Exterior Before & After Photos appeared first on The Spunky Coconut.


